Tuesday, June 28, 2011

Cherry Jelly - Adventures in Canning!

Woo-Hoo! I got the cherry jelly made! Fourteen jars!  I would have never done this if I hadn't bought the steam juicer. 

I made jelly once before years ago - pomegranate jelly.  Ugh, that was an icky time consuming mess.  And we didn't care all that much for it.   I swore I would never make jelly again after that.

It takes a while for the steamer to juice the cherries, 1 - 1 1/2 hours. But, I didn't have to stand over the stove and fuss over it. So I worked on other things (like my "Desert Wind banner) while waiting on the steam juicer.  After the juice was ready, the jelly was quick to make.  Okay, I forgot to take a picture of the steam juicer set up (next time), but I got a picture washing the cherries. . .


The recipe I used is  from the "Ball Complete Book Of Home Preserving".  I'm using 2006 edition, which is the most current up-to-date edition.

It has the only recipe I could find for sweet cherry jelly.  Most of the jelly recipes I found called for sour/pie cherries.  Note, that pie cherries have more acid than sweet cherries.  Because the gel process needs the right ratio of fruit, sugar, pectin and acid I couldn't just use a sour/pie cherry recipe and substitute sweet cherries.  I would most likely end up with cherry syrup.  So I needed to find a recipe that had added acid (lemon juice).


So here we have 3 1/2 cups cherry juice and 7 cups of sugar.  I know, that is A LOT OF SUGAR!!  Traditional jams and jellies take a lot of sugar to gel properly.  (**Never really noticed this till now, but the liquid pectin recipes appear to use more sugar than the dry pectin recipes.)

There are pectins for making low sugar jams and jellies, but I have to admit, I've never used them.  Maybe one of these days I will give them a try!


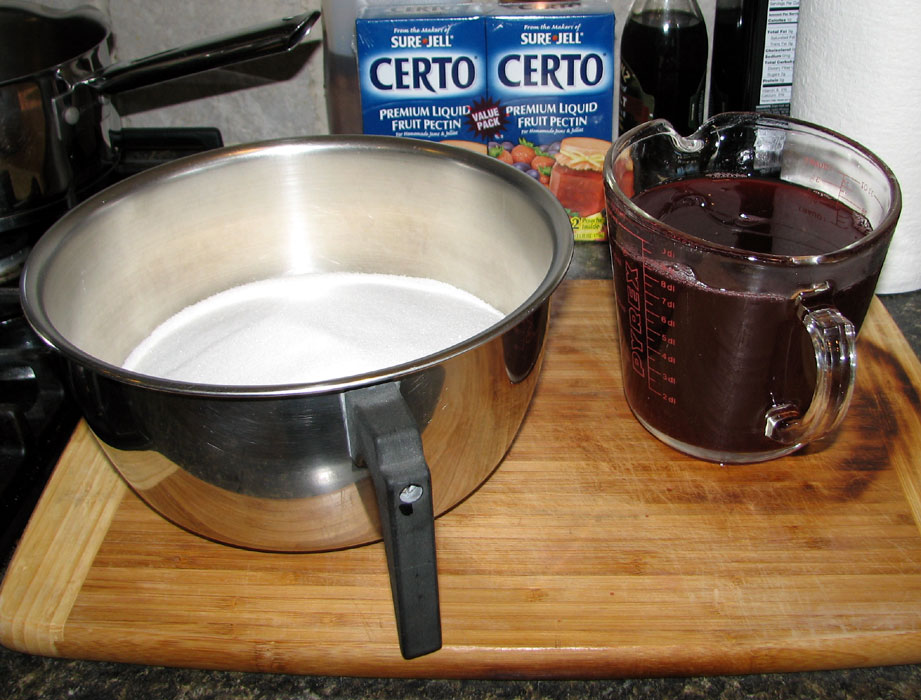
I combined the cherry juice, lemon juice and sugar then brought it to a full rolling boil.  Then I fumbled with the two packets of liquid pectin, squeezed out the contents, while trying to stir and take a quick photo. . . 

I'm used to the powdered pectin, where you add it first, bring to boil then add sugar. The liquid method just messes up my jam/jelly making mojo.


Boiled hard for 1 minute.  Note clock with a big 'ol sweep second hand.  Works perfectly for me for this!  Do they still actually make clocks like this anymore?

Okay, onward.  Turned off the fire under pot and skimmed foam and saved to have later with beer bread.  Note, it is perfectly acceptable to add 1/4 - 1/2 teaspoon of butter or margarine to help prevent foaming.  I did add 1/4 teaspoon of butter, and it does help,  but I still got a bit of foam.


I filled hot half pint jars leaving 1/4 inch headspace; wiped rims, added lids and rings.  Here they are ready for their boiling water bath (BWB).


I processed in the BWB for 10 mins., per instructions.   

Some important notes on processing times: 
  • The 10 minutes stated in this recipe is for an elevation of 0-1000 feet.  When canning anything, verify your elevation.  For elevations over 1000 feet, adjustments to processing times need to be made for a boiling water bath.
  • Always, always check your processing times using current up-to-date information.
  • Also, many recipes for jams/jellies have processing times of 5 minutes.  For any processing time less than 10 minutes, the jars need to be sterilized first.  I prefer to just process for 10 minutes. 


After the ten minutes were up I turned the fire off, removed the lid and waited 5 minutes before removing from the jars from the BWB.  This is a fairly recent recommendation and it helps prevent liquid loss from jars.

Here is the first batch of cherry jelly waiting to be removed.


And here are two batches done!

For more detail canning and preserving information, check out this website:  National Center for Home Food Preservation


Friday, June 24, 2011

Cherry Picking

Hubby and I picked cherries today at a local u-pick orchard: Ray French Orchard  It was an incredibly beautiful day! Warm, but not broiling hot.  Love getting those first summer fruits!


These are called "Benton" cherries, and the trees were loaded!


We picked 50 pounds of cherries!  The inspector had to stick her nose in each bucket we brought home and make sure they met with her approval.


So, this weekend I will be dealing with cherries.  30+ pounds are going to be used to make wine.  Then, I'm going to make a couple of batches of cherry jelly.  I have a steam juicer that makes extracting the juice a piece of cake! After juicing for wine and jelly, I'll see how many are left before I decide what to do the rest.

Next week Ray French will have Bings, so we plan to go pick more cherries.  And I will probably spend next weekend canning. 

And speaking of canning, this will be my second year as a "Master Food Preserver".  It's a volunteer program through the local WSU (WA State University) extension.  Each year volunteers go though a 30 hour training program, and then commit to 50 hours conducting outreach education.  The class and getting out in the community is a lot of fun!

I plan to use my blog as part of the "outreach education" so, hopefully tomorrow, I will blog my cherry jelly making adventure!

Wednesday, June 22, 2011

Summer is the Time for Lemon and Lime

Summer is heating up, and it only just started yesterday! Today it hit 92 degrees F. here at the Desert Wind household.  I'm dreaming of a tall glass of ice cold lemonade. And a refreshing slice of key-lime pie.

Which brings me to the topic of this post - check out some of these cool creations from some of my fellow Polymer Clay Smooshers!  Such refreshing lemon and lime colors! (And much less fattening than the key-lime pie).

I love this carved pendant and the yummy green color. 

Carved Vine Pendant by Fesser Arts
Fruit, yummy summer fruit! These cute stitch markers remind me my favorite part of summer!  (But, I'm looking at those lime slices and still thinking key-lime pie).
Fruit Salad Stitch Markers by Handarbeitskram
Beautiful color and texture and pattern on this heart pendant!
Polymer Clay Heart by River Valley Design
Okay, since I have no idea where I can find key-lime pie around here, I'm going to have to have some lemonade instead.  (Homemade lemonade wine that is)

Tuesday, June 21, 2011

Beads!

I received my order from Fire Mountain Gems on Friday (Yes, I'm a little slow. . .)  Lots of seed beads and Swarovski crystals.  I'm not really that big on using crystals, but when you need sparkle, Swarovskis are perfect for the job.  I feel some freeform peyote coming on!  Or perhaps some bead embroidery!

Okay a little confession.  I have yet to conquer crimp beads. They fail spectacularly for me.  After watching several You-Tube videos, I'm going to attempt them again.  I ordered sterling silver crimp tubes that are the right size (I think) for my beading wire.   I hadn't ordered sterling silver anything in a long while - $9.43 for 100 crimp tubes!!! Good grief!  Hopefully I'll get over the sticker shock in a few days and attempts some stringing and crimping.


In the meantime, I have been working on redoing my banner.  Here is a photo of what I have so far.  It looks much better without the distracting flourishes.  And it will look so even better when I scan it in (I think).  

Friday, June 17, 2011

Crawling Out of a Creative Slump

Once again, my muse has abandoned me.  She does this far to often.  Right now, I'm fighting tooth and nail to get out of this creative slump I've been in.

Perhaps you have noticed my new blog banner?  I'm not completely happy with it.  It looks okay enough on paper, but it's not quite working for me as a banner.   The flourishes around the text are too distracting.  Also, its to large to fit my scanner bed so I ended up photographing it which yielded a less than optimal digital version. 

I'm redesigning a "new and improved" version, sans flourishes.   And I'm doing it in a manner that will allow me to scan the separate bits in and put it together in Photoshop (I hope).

On the jewelry, polymer clay front:


I put together this stretchy bracelet a couple of days ago using "Stretch Magic" to string it.  This was fun to make!  I want to make some more and see how well they wear.  It is simple to wear - I love not having to deal with the clasp.  And it's more comfortable (to me)  than a bangle type bracelet. I'm just not sure about how the Stretch Magic will wear.

And as I type, I'm anxiously awaiting a Fire Mountain Gems order and hopefully that will get me fired back up! Hurry up, Fed-X!!!